Friday 10 December 2010

Body Shop, Body Shop, Boom Boom Boom

A few weeks ago I was asked to assist on Body Shop's 'Brush With Fashion' catwalk show for the release of their new, sustainable, cruelty free make up range for Spring 2011.

It was a collaboration with London College of Fashion, with alumni Nikki Palmer heading the make up team, alumni designs from the likes of William Tempest and Jena Theo on the catwalk and LCF student Katarina Voloder, a Fashion Illustration student who designed the packaging for the new collection. An LCF family affair!

Here is LCF's own coverage of the night… Snapshot


There were four make up looks all created with the new Body Shop range, and I was in charge of the one above.

It was a really fun night and I learnt something new, LCF keep honey bees on their roof!
I was going to post some photos I took myself, but my iphoto won't open, boo hoo!

So instead here are some links to press coverage of the event, I am proud to link coverage from Vogue, my make up work is on Vogue!!


Bisous bisous xxx

Thursday 9 December 2010

Vegan Holy Grail

Macarons!!

Crispy and smooth shells, moist melt-in-the-mouth with a tiny little ruffled foot (circumference). Kind of.


I had been following a thread on the Post Punk Kitchen forum, started by Andrew, a baker on the vegan macaron quest. It seemed that he was days from revealing his recipe when they archived the live threads and it was lost.
And then he appeared again, with his recipe! http://veganfordracula.blogspot.com/ Hurrah!

And so I got my VersaWhip out and got to work.
For my first ever attempt at Macarons (vegan or not) it wasn't too bad, sort of!


All seemed well until I peeked into the oven after 5 minutes to see the little macaron shells spilling their guts all over the place like tiny volcanoes.

This was for several reasons….

1. The oven was too hot
2. There was too much heat coming from the bottom of the oven
3. The shells had not been left to dry for long enough


I left my shells to dry for over two hours before putting them in the oven, but I think that because it was so cold in the kitchen they had not dried completely, leaving small soft weak spots on the shells where the insides promptly erupted from.
Normally the top of the macarons should be dry to the touch before going in the oven as this helps to prevent cracking and makes the macaron rise up, forming the signature little ruffled foot.

So for my next attempt I shall…

1. Decrease the oven temperature
2. Triple stack the trays, this should prevent too much direct heat getting to the bottom of the macarons, hopefully meaning that they will rise gently
3. Leave the shells to dry COMPLETELY before putting them in the oven, no matter how impatient I am!


Pre-oven, excited!


R.I.P Macarons


I also didn't allow the macarons to
dry before trying to pull one off to eat!


As my boyfriend lovingly commented, they look
like horribly deformed lady bits.
I'm sure I don't know what he means!


You can find the recipe on Andrew's blog. (link above)
I pretty much stuck to the original recipe, apart from I used liquid colouring and vanilla paste rather than powders, which are not readily available in the UK and I was too impatient to make an online order and wait!

The taste was so similar to a non-vegan macaron, I was very pleased on that front!
I think I probably need to grind the almond meal finer to give the shells a smoother dome, but the texture of the shell (and it's spilled guts) were very near perfection. With a little work I think the Holy Grail is in sight!


Bisous bisous xxx


Monday 29 November 2010

Late for the first challenge!


I recently signed up to an online community of bakers. The idea is that every month a baking (or cooking, depending on which you choose) challenge is set by a member of the community and all participating bloggers must complete the challenge (in secrecy) and post their results on a designated day (the 27th). Which I have managed to miss!

So, this is my late entry, and I'm hoping I remember next month as you can't miss more than two in a row or they boot you out!

This month's challenge was set by Simona (http://briciole.typepad.com/blog/) and it was to bake crostata, an Italian dessert. The base of a crostata is pasta frolla (or pastafrolla), sweet short crust pastry (or sweet tart dough) made of flour, sugar, butter and eggs. Being a vegan baker I was allowed to alter the recipes she gave, as normally you have to stick to the ingredients as instructed. And so here is the recipe I used…


PastaFrolla

250g flour
100g margarine
100g sugar
a small glass of oat milk (to add as needed)
a pinch of salt
grated rind of 2 lemons

Place all ingredients, except for the milk, in a large bowl and gently work with your fingertips (or whiz with a hand mixer) until the ingredients come together in a sand like texture.
Tip out the mixture onto a clean surface and create a well in the centre. Pour the milk, (a little at a time until you have a soft dough), into the well you have created. Using a fork gently fold all the ingredients in together.
You will need to start using your hands to bring the dough together, it will be soft and easy to work, but be careful not to overwork it as this will make the dough elastic.
Wrap the dough in clingfilm and allow it to rest for at least an hour.


Assembling the Crostata

I decided to make a wintery, comforting filling for my crostata, spiced apple and pecan with a crumble topping :)
I collected cooking apples from my garden, peeled and finely sliced them and then mixed them up in a bowl with cinnamon, nutmeg, cinnamon and vanilla sugar and a tiny pinch of crushed cloves.

The pastafrolla was rolled out to about 2mm thickness, and then placed into individual greased tartlet pans. Prick the bottom of the tarts and be sure that there are no nasty air bubbles lurking there.
When you roll out the dough keep it on the clingfilm, you can then easily flip the dough into the pans without having to try and unstick it from your work surface!


I then arranged my fillings inside the tartlet pans, apple then chopped pecans then a sweet crumble topping with poppy seeds.
They were baked for around 25 minutes at 175 c. (Depending on your oven type and temperature this may vary)


The pastafrolla was buttery and biscuity, the filling was warming and christmassy and the crumble was nice and crunchy :) Not too bad!


Next time I will be a little more experimental with the filling instead of going for the safe and easy option! I'm looking forward to trying out the pastafrolla (minus the sugar) in a savoury recipe, a nice vegan quiche!

Easy vegan tarts, and they definitely kept the fella happy :)


Bisous bisous xxx

Tuesday 16 November 2010

Excited!


Apologies for the lack of posts, all you keen followers must have been champing at the bit! Ha!

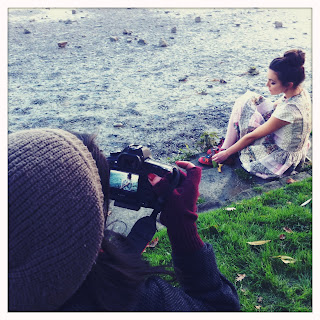
I have been very busy with arranging holidays and shoots! Today I was on a shoot with Stylist Sophie Surridge, which was such good fun despite the freezing weather and fog. Below are some snaps from the day and I really can't wait to see the final images, they looked beautiful :)


All the rage down in Chiswick Malls ;)


Su Jin, ready for the mud!


Clothes by Lu Flux


Cute! (word of the day)


The beautiful, beautiful model.


This is just a quick post as I'm off to sort out my kit for this tomorrow….

Monday 1 November 2010

Shoot with the English National Ballet


Busy busy busy.

Having been on family weddings and holidays I have had no time to bake! So this is a fashion post :)

A few months ago I was lucky enough to be chosen to take part in a collaborative photo shoot with the English National Ballet (ENB), I don't yet have any of the final images as they are to be exhibited in the Victoria and Albert Museum in London at the end of this month! Exciting! There have been several shoots leading up to this exhibition and open workshops at the V&A, and I have been lucky enough to have taken part in two shoots. This is a post about the first shoot which was sponsored by Hasselblad!
The team consisted of 5 stylists, 5 photographers, 3 illustrators, 6 make up artists, 1 film maker (all LCF students) and 10 ENB dancers.

The shoot took place behind the Royal Albert Hall in the ENB dance studios.
It was a hectic rushed day, with the dancers coming and going throughout and all having to be done by 4pm in order to get ready for the evening performance of Swan Lake!
There was the usual know-all obnoxiousness from the photography students, but the dancers were all so lovely, they made the day that little but easier :)


Bisous bisous xxx


Tuesday 19 October 2010

Whip it

Having read so much about VersaWhip on vegan blogs and forums I decided to order some to experiment with.
It had to be shipped over from America, as they do not yet sell it outside of the USA, as is the case with so many American vegan products.

VersaWhip is not vegan by design, it is used in molecular gastronomy as a more stable replacement for egg whites, you just whip it up (with water) and it can then be added to any recipe.

There are a few vegan cooks out there at the moment who are experimenting with it, mostly trying to produce macarons, meringue, marshmallows etc. And because the VersaWhip comes without instruction or recipes of any kind, it's a case of trial and error, and sometimes complete invention!

I managed to find a basic vegan meringue recipe using the VersaWhip and decided to have a go, before I tackle my vegan daemon…macarons!

The recipe I followed was from a site recommended by a user on a Post Punk Kitchen forum, http://chocochichi.com/

Vegan Meringue Cookies

Ingredients

1/2 cup water
2 tsp Versawhip 600
1/2 tsp xanthan gum
3/4 cup powdered sugar
1 – 2 Tbsp flavor extract

Instructions

Preheat oven to 100 degrees C. Line a baking tray with greaseproof baking paper.

Pour water and VersaWhip into a large metal or glass mixing bowl. Beat with electric mixer on low speed until frothy, then increase speed to high. Whip until soft peaks form.

Combine xanthan gum and powdered sugar in a small bowl. Gradually beat into Versawhip until stiff peaks form. Add flavor extract and beat briefly to incorporate.

Drop meringue mix by tablespoon onto parchment-lined baking sheet, or pipe it on using a pastry bag with a large tip.

Bake at 100 degrees for 1 1/2 to 2 hours, or until completely dry and firm to the touch.

Let cool, then remove carefully from baking paper. Meringue cookies should be stored in an air-tight container at room temperature. If they begin to soften, they can be crisped again by baking at 100 degrees for about 15 – 20 minutes.


Water and VersaWhip


All ingredients whipped and ready to be piped


Standing your piping bag inside a glass or cup makes it a lot easier to fill and leaves you with both hands free!


I used a sandwich bag with one of the corners cut out as a disposable piping bag.


Ready for the oven.


Out of the oven, crisp shells with a chewy centre.


I baked my meringues for around 2 hours as they did not seem to be hardening. When they were out of the oven and had cooled down they were very melt in the mouth with a chewy centre. For me the outside was not really crumbly enough, they melted too fast and were a little dusty, so maybe I had baked them for too long!

After a day or so the insides were even chewier, which I liked, but the outsides had gone soggy. I put them back in the oven for 15 minutes, the outsides crisped up leaving the insides soft, this texture was a lot closer to a non-vegan meringue.

In regards to taste they were flavoured a little too much. I think you probably only need the smallest amount of vanilla or they start to taste like marshmallow rather than meringue, though I guess this depends on your preferences!

I found the VersaWhip really easy to work with. It whips up into stiff peaks so easily and rather quickly, and even though I left them to sit for a good 20 minutes (because of a phone call) they had not collapsed back in on themselves or broken up, which is usually the case with egg whites. I'm already looking forward to tackling macarons!

I think I will keep experimenting with this basic recipe, have a go with different flavours and see how a big dessert size meringue works! Come over if you want a taste :)


Bisous bisous xxx